How can you be sure, that a Git commit is authentic? That it was made by the person it claims to be made by?
Git allows for signing commits to provide proof that you authored a commit. The same signing mechanism can be applied to creating Git tags. This signing feature can be integrated with GitHub to make signed contribution visible and to require them by default.
Context
At Stackable, we recently made the decision to start using signed commits and tags. This article is a slightly enhanced version of an internal how-to that was created to share knowledge.
In the spirit of open source, we hope that sharing our learnings will help other companies and teams to adopt this practice with less up-front research investment, and make it easier to enhance their security posture.
An Overview
You will need to make configuration changes on your development machine, and in your GitHub account for this to work.
The signing methods we currently use are GPG and SSH, as those are the only two methods that GitHub can currently verify. Having a visible integration with GitHub is important for us as an open source company, as the „Verified“ badge will show up in the main interface that developers use to interact with our code.
S/MIME and gitsign don’t fit this constraint, as GitHub doesn’t validate them at the moment.
If you are in doubt: SSH is probably the most convenient way to get started, as you are probably already using it to access GitHub.
Note, that using signed commits will require you to enter your key passphrase on each commit. There are agents (for SSH and GPG) that can make this easier for you by caching the password.
The following will introduce how to setup both signing methods – with links and step by step instructions.
1. SSH Signing Method
You only need to follow these steps if you want to use SSH keys for signing.
Git (for SSH)
This will set up Git to sign using your SSH key. This key does NOT have to be the same as you use to access GitHub but it CAN be:
git config --global gpg.format ssh
  git config --global user.signingkey <path to your public key>
# e.g. git config --global user.signingkey ~/.ssh/id_foobar.pub
While it’s strictly an optional step, you can now enable signed commits and tags by default. If you do not do that you’ll have to do it separately for each repository.
git config --global commit.gpgsign true
git config --global tag.gpgsign true
Optional: Verify Commits Locally (for SSH)
If you want git log --show-signature to be able to verify your commits you have to follow these steps.
# The path of this file doesn't matter
echo "$(git config --get user.email) namespaces=\"git\" $(cat ~/.ssh/<MY_KEY>.pub)" >> ~/.ssh/allowed_signers
git config --global gpg.ssh.allowedSignersFile "~/.ssh/allowed_signers"
Source: Sign commits with SSH keys | GitLab
Optional: Signed Pushes (for SSH)
Git also supports signing pushes as a form of attestation. Unfortunately, GitHub does not support this at the moment. You can still enable this feature so that it’ll sign a push if the server supports it. This will result in a warning message every time it can not sign a push:
git config --global push.gpgSign if-asked
The warning is: warning: not sending a push certificate since the receiving end does not support --signed push
GitHub (for SSH)
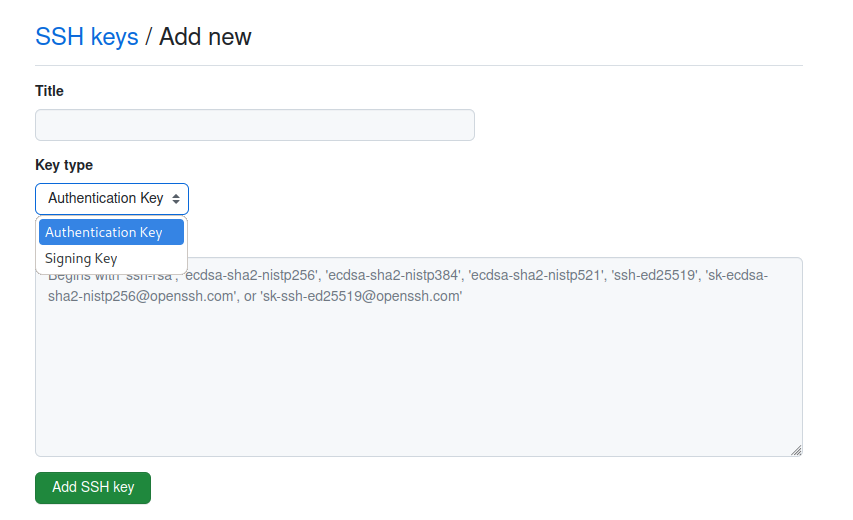
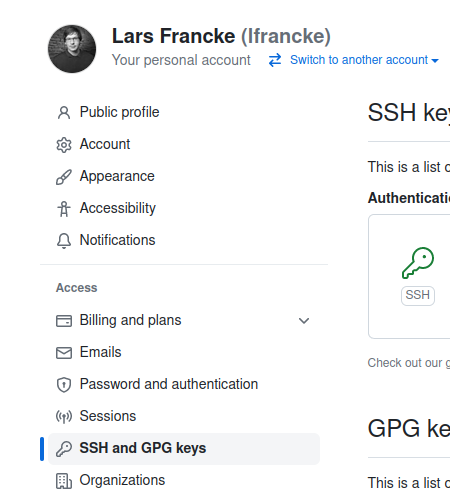
Go to GitHub: https://github.com/settings/keys
And add a new SSH key but make sure to select Signing Key

You need to add your SSH key again even if you’re using the same one for authentication!
Now your key should appear here:

Vigilant mode (for SSH)
For extra security you can enable vigilant mode in GitHub:

This can be enabled at the bottom of the same page where you add the keys.
2. GPG Signing Method
You only need to follow these steps if you want to use GPG keys for signing.
Setup (for GPG)
First, you need to get GPG, this tutorial uses GnuPG but there may be other implementations.
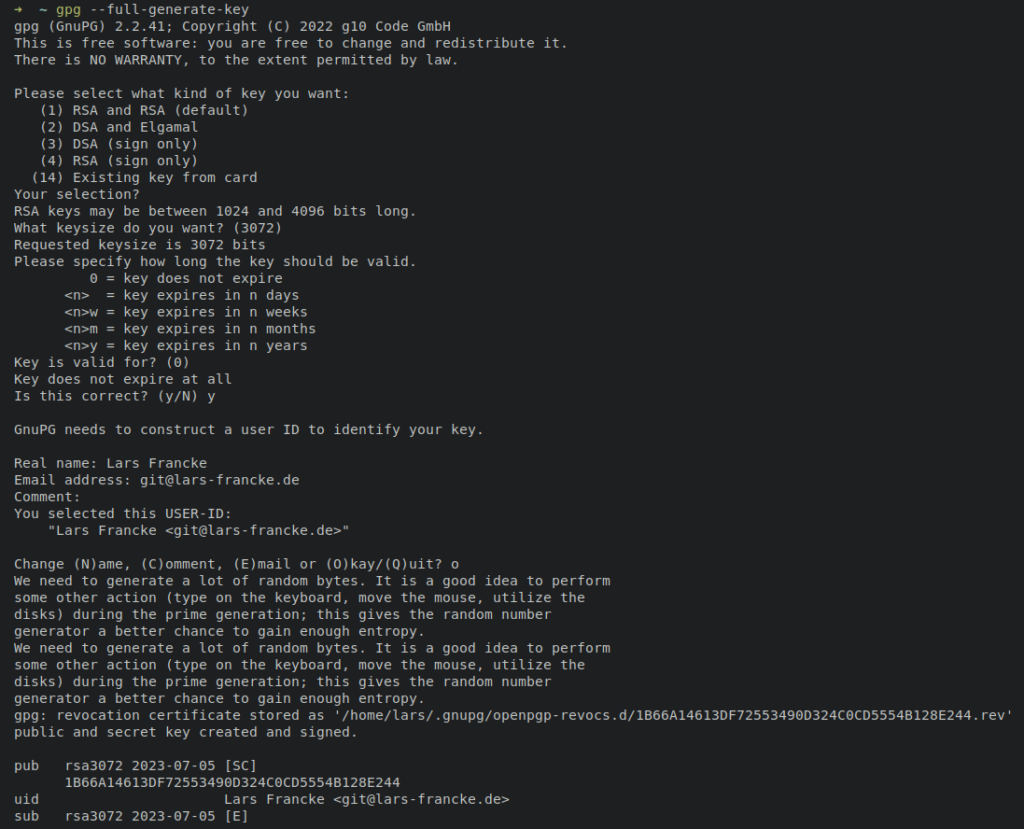
If you do not have a GPG key yet you need to create one: gpg --full-generate-key
Answer the questions as you wish but in general:
- RSA and RSA
- 3072 is fine: GnuPG Frequently Asked Questions
- „0“ for expiration is fine
- Use common sense for the rest but match the E-Mail address to your Git and GitHub config

Git (for GPG)
You will need your key id which you can find using: gpg --list-secret-keys --keyid-format=long

In this example the string C0CD5554B128E244 is the key id we’re looking for (these are the last 16 characters of the full fingerprint in the line below).
Now tell Git to always use this key to sign commits: git config --global user.signingkey <your key id> (example: git config --global user.signingkey C0CD5554B128E244)
If you want Git to sign all commits and tags from now on (and once this is set up there is not really a reason not to) you can tell git to do that using:
git config --global commit.gpgsign true
git config --global tag.gpgsign true
Git also supports signing pushes as a form of attestation. Unfortunately, GitHub does not support this at the moment. You can still enable this feature so that it’ll sign a push if the server supports it. This will result in a warning message every time it can not sign a push:
git config --global push.gpgSign if-asked
The warning is: warning: not sending a push certificate since the receiving end does not support --signed push
GitHub (for GPG)
Go to GitHub: https://github.com/settings/keys
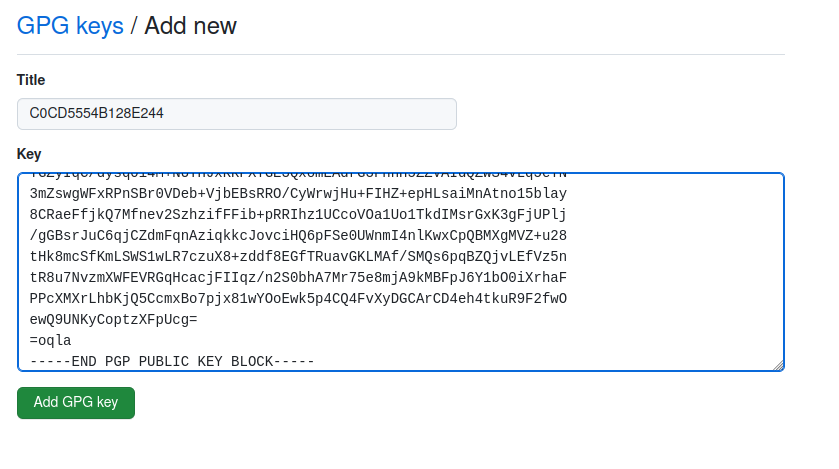
To add your key you need to get a text version of your public key: gpg --armor --export <key id>
Example:
# gpg --armor --export C0CD5554B128E244
-----BEGIN PGP PUBLIC KEY BLOCK-----

mQGNBGSla/kBDACfYjRciCG2Lz1XQ/F64f1rr8zQgbq8aXsw5ci5BNfQQOIsuDQf
Ui0BG0IpQYMUCo/lOteQxtPWAjIAww5cQ/eIkojAMnLOGGhBk1CgVpFfLk/+CvJh
EMpRLJVWjRNI9HXs61/0JNq4ihXgS6q7Iw9h+d2Qzn/UvSDynYYwAvVsfR2P6lin
KQHxgfCxbGtMKz76LHpdk/9uN52iQS20N5wDjgd2FPVfMwmHGVH2LJjO9u66oFmY
PprUQqFBLfls8cBWyIZ8q9IPhCAWpIftJlZBn+SOIUHefUD/Tg5b+omAMcssay7B
A+jt1+aaT9YQVZYSx3Da/oVrHVL8TcFev6x4ieO00F/cXY34Jk8tvGpboxu0g+2m
nW8jKGnqHlqPd+JlWCCA/uwXez5xKyyJPOXJQKBLN574sislagfwSb2dH3Qkpxdm
owT4oUrIiNJQCQ5xCQk61GjfsX5aD9aPjl8tTz+oH0vwbsc1TWOPLDsmmsZLxD4p
bCP37G2LFe9LiDkAEQEAAbQiTGFycyBGcmFuY2tlIDxnaXRAbGFycy1mcmFuY2tl
LmRlPokBzgQTAQgAOBYhBBtmoUYT33JVNJDTJMDNVVSxKOJEBQJkpWv5AhsDBQsJ
CAcCBhUKCQgLAgQWAgMBAh4BAheAAAoJEMDNVVSxKOJEcJYL/3fAzlbgHJIr/T5T
AP6lJ0cq2sOq3lAaNqoprS4jzhPbD363JMgrLG1zBUXkUlGed5qKzUuotwrCgI1X
Rp/gWFnWNxZxz8kjxmvYPJAngV76aDPfAV7H+WC5pQO3ZnamwFSRKdgIDlc58b8Z
ltf8oE8ZFZ1NrSTLIvjMzWCyU9E+LvqrLej0Azc84YTOOL/9EDezyyGGNt1JPBsb
+yglj/NKrky5s70rqH2F47bXBxeTVThXy5wvEM/j9PjOs0bV15B5v1Cn4qAsCOJT
PbB27Krz9kUtfllw0RqqDt5L4gi1dYAtfqyHgVAq4L14Bo0I286EmcR6/lb4DVl5
WyiXPZpaKIPhDHddCtQPa/DRbwhrcgePpxwtNY7OoAtF8cpAkXOsV5QdihRKwwsM
P/lqJ2fy5et3pGku0zZGsx8MvNRL84xkFVdyQhuKRXI4bR17dltwWlB4JTjy1bln
TlY3AtGzzLA6W3FtZRpzbFercQ7bqGF320BeNAmQVo7GWnU8i7kBjQRkpWv5AQwA
1nazOHBDCM6fJ9ANdb1fSduwjm4wrxA1tz2SyfdO8cb2yIeNF11B7s0Z6bA60I2g
geV9FoFCdZ2hdPmRgcidreVx4lYlQ/1Uw16HzbEutSRTRDfrR77MReth50mbESTx
zrcfcV+2fGOGwSmY9ynkylLM9evdTpA+rIiGYFrzW6hsTC/7fxwo/rtjnlOzCO2s
NxqbHkO87PrDF5vbiGMs9LsBpgesjqGymRhAxq8od/HCfZIa4HnWEXyo8U9+gEf6
xvlFjx/xyWpZCcim8Cj3sFuBZXKZHDneMm+wyfCj41/f+jIEpZijpdySLIcf7h5h
0zgrzuhdmorR6l5Y9r6C8of7HB3mGEyUAi9DfJQ8EgL3nno94m4SHCygKDMdRxco
fuAAp6L89KUwo05UAerV+o0gcs1xYWOl6eBu8N4R7JXIO6ZxDvhOsV3OOtHx3sOF
BvhDfFCpPNmzUuI1U+duxTLgsx2yW3nCwIqeR0wxyykYnDjQ436WGvXgc6PFNuW1
ABEBAAGJAbYEGAEIACAWIQQbZqFGE99yVTSQ0yTAzVVUsSjiRAUCZKVr+QIbDAAK
CRDAzVVUsSjiRLiOC/9hr05xnE3op+/hpJsf2bxCHuIJrs7jPxWoaxhNO/TIXklD
YGZyIqC/dysq0i4M+NUTHJxRRPXYGE3QxomEAdrG3FhnH5ZZVAIdQZwS4vLq5eTN
3mZswgWFxRPnSBr0VDeb+VjbEBsRRO/CyWrwjHu+FIHZ+epHLsaiMnAtno15blay
8CRaeFfjkQ7Mfnev2SzhzifFFib+pRRIhz1UCcoVOa1Uo1TkdIMsrGxK3gFjUPlj
/gGBsrJuC6qjCZdmFqnAziqkkcJovciHQ6pFSe0UWnmI4nlKwxCpQBMXgMVZ+u28
tHk8mcSfKmLSWS1wLR7czuX8+zddf8EGfTRuavGKLMAf/SMQs6pqBZQjvLEfVz5n
tR8u7NvzmXWFEVRGqHcacjFIIqz/n2S0bhA7Mr75e8mjA9kMBFpJ6Y1bO0iXrhaF
PPcXMXrLhbKjQ5CcmxBo7pjx81wYOoEwk5p4CQ4FvXyDGCArCD4eh4tkuR9F2fwO
ewQ9UNKyCoptzXFpUcg=
=oqla
-----END PGP PUBLIC KEY BLOCK-----

Add your key:

Now your key should appear here:

Optional: Vigilant Mode (for GPG)
For extra security you can enable vigilant mode in GitHub:

This can be enabled at the bottom of this page: https://github.com/settings/keys
Usage (for GPG)
If you set the global options commit.gpgsign and tag.gpgsign you don’t need to do anything special and Git will automatically try to sign all commits and tags from now on.
The method by which git tries to sign can be configured using the gpg.format option which defaults to openpgp but can be set to ssh or x509 (not used at Stackable).
At least IntelliJ picks up the setting automatically as well.
If you don’t set the option you can pass the -S option to git commit.
$ git commit -S -m "YOUR_COMMIT_MESSAGE"
GitHub will (should) now show your commits as „Verified“:

You can also check locally: git log --show-signature
In Conclusion
This has been an overview of two ways to set up signed Git commits and tags with SSH and GPG methods respectively. Those methods were chosen, because they are well integrated with the GitHub interface, which is the home of all our Git repositories.
It is a practice that we just started to adopt at Stackable, and we hope that taking a bit of effort to share the conclusions of our initial research can help save you a bit of effort.


